Download WP Datepicker installation package and extract the files on your computer...
Use FTP or SFTP client to upload the contents of your WP Datepicker to the new directory that you just created on your web host...
Log in to WordPress Dashboard and activate WP Datepicker plugin..
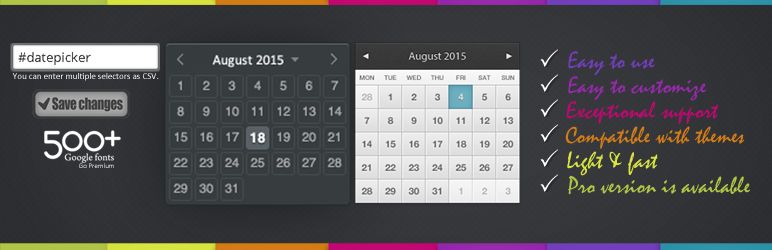
Quick tip for everyone who is looking to use it on mobiles 1 ) Use the element for your datepicker 2 ) Also try to keep autocomplete=off 3 ) And use the readonly attribute.
How to install WP Datepicker and Configure 1 ) Go to plugin section click on add new and then write wp in search bar 2 ) Click on install button wp datepicker and then click on activate respectively 3 ) Settings Menu > WP Datepicker > Settings Page.
I ) Now go to the options panel in the input field write id of the input field with hash sight #calendar and click on save then refresh page, here first input field have calendar and other two fields do not have this calendar..
With bit of raw install testing to replicate the issue, Fahad had found the problem, retested and issued update fixing the bug.
The developer was kind enough to resolve these and the plugin works great now.
Because you could identify CSS ID names and classes to generate datepicker interfaces, it provided more flexibility than the other plugins that I looked at and was simpler to integrate than hardcoding Jquery snippet into wordpress for my site development project..
Browse the code, check out SVN repository, or subscribe to the development log by RSS...
Read more
Related items: